" /> Garn Boet - The Yarn Nest: June 2007 Archives

« May 2007 | Main | July 2007 »

June 30, 2007

WIP update version June 2.0

To cut a long story short, my computer, which has served me faithfully for three years, crashed today. Like in dead. It took me eaons of time to find the right log in page to Movable type, to find my copies with all password, to install Photoshop, to install mails and you name it more to our second laptop. But now it's done, and I'm free to blog again. But I have no spell check, so please, do not complain on grammar or spelling mistakes.

I feel it's time for a WIP update again. Those with eyes for details have perhaps noted that the sidebar got updated a couple of days ago, and I have now updated it with a third project.

Blusteryback.jpg

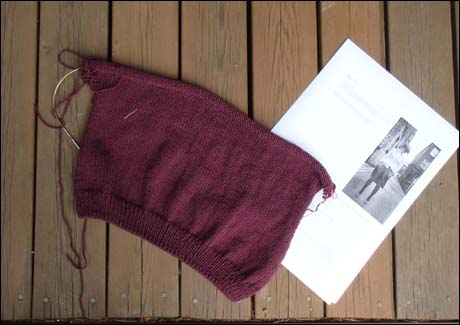
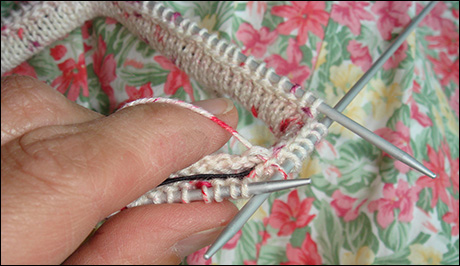
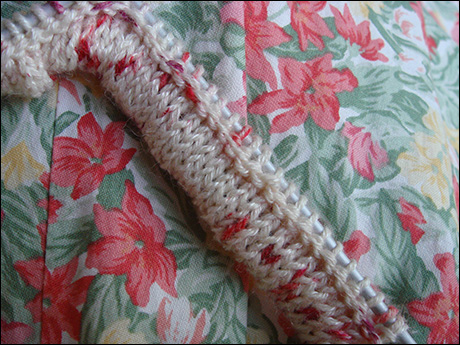
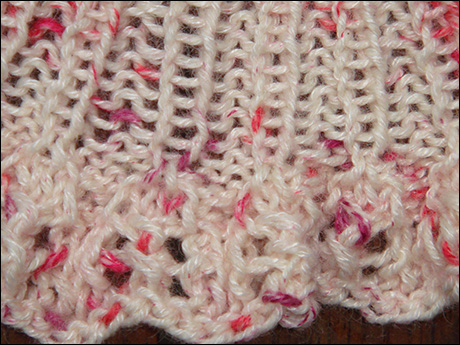
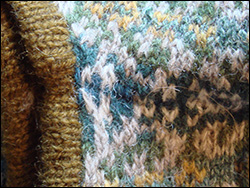
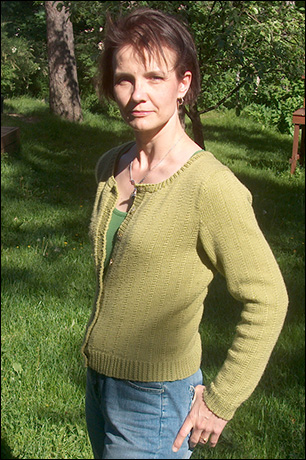
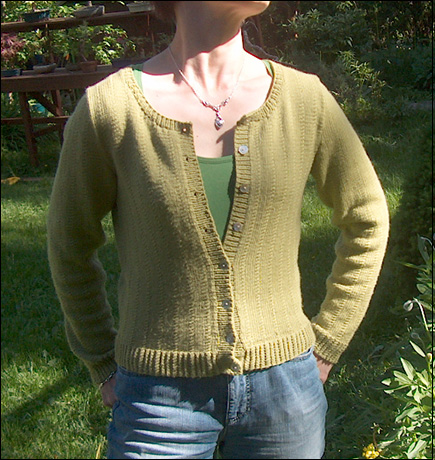
First up on my now ongoing projects is Blustery. Blustery is a very simple vest by the talented Anna Bell. I like the clean cut od the vest and the small pockets. Anna's pattern have been very good for my body tye before, and I have high expactations on Bluster. The pattern is written for Debbie Bliss Cashmerino Baby, but my yarn choice is this time Rowan WoolCotton. I have enough yarn in the stash in this lovely plum colour. WoolCtton is a bit thinner than Cashmerino Baby, thus I had to change to 3,75 mm needles instead of the suggested 4 mm. Blustery is cast on with a beautiful tubular cast on, that really looks neat. Want to see it?Just click here!

Spiralbootsock.jpg

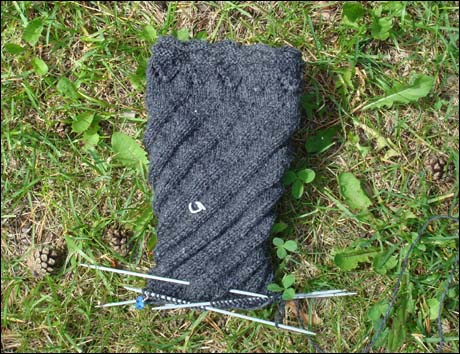
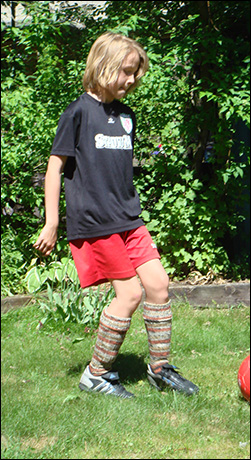
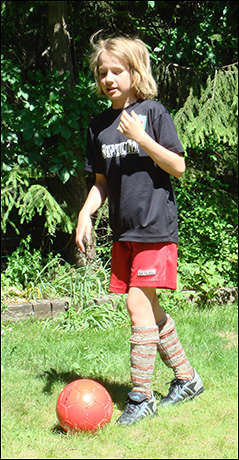
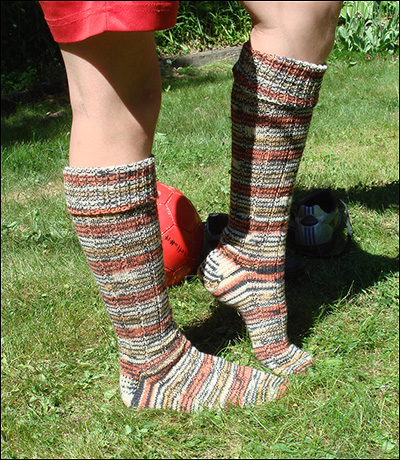
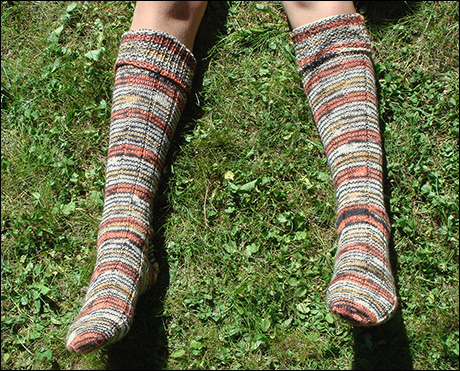
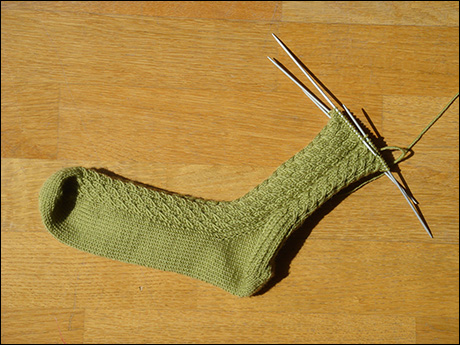
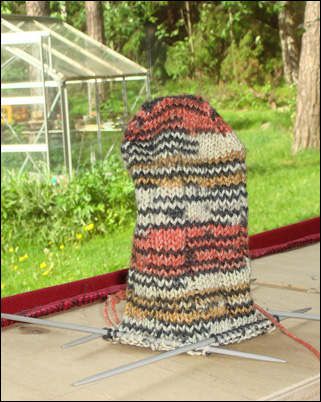
I had one big ball of the Finnish yarn Novita Nalle in the stash, a dark carchoral grey colour. It should be enough for knee high socks, and I immedetliaty came to think about the Spiral Boot socks by Veronik Avery, from Interweave Knits Summer 2007. I'm knitting on 2,5 mm dpns, and I'm about halfway down the first leg. The pattern is very fun to knit, and very clever. There are three different patterns in the leg spiral, all of them basically the same, but with different amounts of stitches. As you advance down the leg you decrease stitches twice, and shape the leg that way. But the increases are almost invisible, and it looks like the same pattern continuing from the top to the bottom of the leg. I think I have enough with yarn, the pattern requires three 50 gram balls, and my big ball is 150 grams.

randigasockor.jpgrandigacloseup.jpg
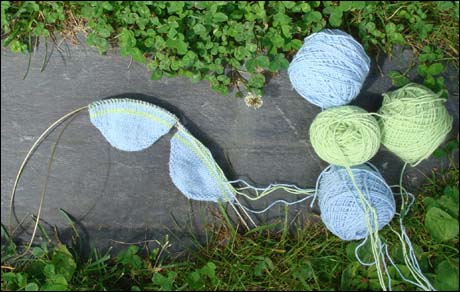
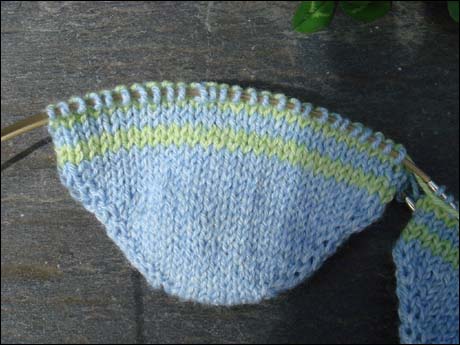
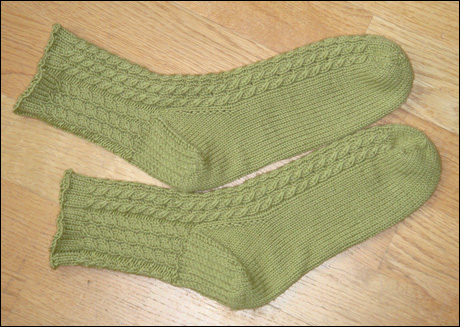
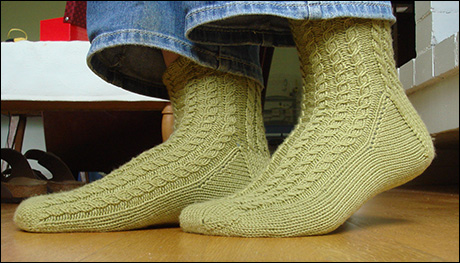
And third on the list is a pair of socks I cast on as travelling knitting. They are a simple pair of striped socks, knitted from the toe up in Regia cotton, and sized for my older daughter. I have a little more of the blue yarn, and I will knit the toes and heels with that colour. I'm interested in using up all the yarns scraps, but to get the socks look the same. There is also the risk of getting a second sock syndrome with a pair as simple as these, and this tofether with the goal of using up all the yarn, is the reason why I decided to try to knit both socks at the same time, using the magic loop technique. I have never before used it for anything but the toe part of toe-up socks and for small projects, but it goes quite nice with both of the socks on the needle at one time. It also makes the shuffle of the needle and the loops less irritating when you can knit both socks before you have to shift places for the needleends.

That's all for today folks! I'll update the different projects as I advance. Have a nice day all of you. Sun is finally back here in the south of Finland, goodbye rainy days for a while again!

June 28, 2007

The teddy bear skirt

Nellikrukan.jpgNelliistolen.jpg

Linning.jpg
My daughter Hanna asked some time ago for a summer skirt for her teddy bear called Nelli. After taking a look at my left over sock yarns she decided she wanted the skirt made out of Regia Bamboo, the scraps left from my mother’s birthday socks, version 2007. The skirt was knitted in two evenings, and finished yesterday.

I chose 2,5 mm needles, in order to give the skirt more drape than what the knitted fabric in the socks had had. I cast on the required amount of stitches for the waist band, and knitted in stockinett for twice the width of the elastic I was about to use. I then picked up the stitches from the cast on, and knitted them together with the live stitches, with the elastic in between. This was easily done, and I avoided the work of having the waist band to be sewn in place and the elastic treaded in. I think the result is pretty neat. Click on the pictures in order to get them bigger and to see better!
Linningcloseup.jpg

The skirt itself is knitted in simple 2 purl, 1 knit stitch. When it was almost long enough I added one more purl stitch, and a couple of rows later started the bell shaped hem. I added knit stitches until there were 5 knit, 3 purl stitches. The small lace motif in the bells is made with yo, SSKP, yo on every second row. I then knitted one row and cast off in purl stitches. Quit simple, but the hem is a bit flashier than it would have been with just a simple cast off.

Zoominnedrekanten.jpg

Click here to zoom out!

As a side note I can tell you it has been so cold and rainy here today (yes it's rain drops you can see on the zoom out picture), that I actually has worn Venezia all day long! And I still love the pullover, in fact even more now when I know how great it is in use. So all you WIP Venezia knitters, hurry up and finish your Venezias! It’s worth all the work of it!

June 24, 2007

Watch out for penguins!

Penguinparade.jpg

The penguins are finished. I had planned to make two for my niece, the penguin fan, but when the first one was ready, and my younger daughter saw it and fell in love with it, I couldn’t help myself, and I made a third. Already when knitting the first penguin I thought about how the pattern could be altered to make the sewing easier. But since my niece was about to get two penguins, I made no alterations on those but knitted them exactly as the pattern called for. Sofia’s penguin got the alterations, and I must admit it made assembling the penguin a lot easier and faster.

Pingvintrassel.jpg
I washed and blocked the pieces for the two first penguins, making the mistake to put all the pieces in the washer to get the water away in the centrifuge. A good idea, except the fact that all the pieces had their ends free, not woven in. Look at this mess. It took me quite a while to sort it out, but I managed to get all ends saved for the sewing.

Penguinfeet.jpg

To sew the two first penguins together took a while. The back body and beak are knitted flat according to the pattern. For the third penguin I decided to start knitting the head on dpns at the stage where you increase stitches, and also to knit the beak in the round. The feet are knitted in two pieces that are supposed to be sewn together and then sewn to the body of the penguin. For the third penguin I cast on using the magic loop toe up cast on I have used for the Tiger socks and the Spindle socks. It was a bit tricky, since the pieces are so small, but not trickier in fact than knitting the feet pieces separate, and now I got the pieces knitted together at the same time. I really recommend this method. It also make the feet flatter as you can see on the picture above (the penguin to the right), and that again enables the penguin to stand better.

Penguinwings.jpg

The wings are knitted as a flat piece. Again, in order not to have to sew the edges together, I used the magic loop method to knit them. The wings are, as you can see on the picture, much flatter, and, in my opinion, a bit more penguin like.

Project details:
Pattern: Pasha the penguin from Knitty, by Alexandra Virgiel.
Yarn: Black: Novita Seitsemän veljestä, white: Regia silk held doubled, yellow: Jamieson Spindrift held doubled.
Needles: 4 mm dpns and circular needles.
Alterations: Two without, one with, look above.

Penguins.jpg

The penguin pattern is all in all an enjoyable one. The penguins are formed with short row knitting, something I like a lot (it’s only when it comes to short row toes and heels I’m more sceptical) and increases and decreases. I think they have a nice chubby body, and they are very huggable. Sofia’s penguin has already made trip to the archipelago, and been a constant bed time companion, and I’ve got reports that my niece is quite fond of her penguins too. She looked very happy when she got them, and hugged them with her whole small body. She’s a lovely child, not only because she loves my penguins. She is just so cute and huggable herself, like three and half years old only can be.


June 20, 2007

Venezia's V-neck

This posting is long over due, but thanks to a gentle reminder from my e-mail list friend Nissa that I haven’t posted the Rosebud mitten pattern, I realized I haven’t posted the Venezia alterations either. I’ll start with Venezia, and the Rosebud mitten pattern will follow very soon, I promise.

Necklineinside.jpg
This is how I changed my Venezia pullover to have a V-neck line instead of the boat neck the pattern gives instructions for. The instructions are for the second smallest size, 34 ½ “.

On the first row number 18 of the body chart, put the centre stitch on a piece of scrap yarn, and cast on 11 stitches for the front steek. The border stitches are knitted in the background colour. Decrease before the steek as a slip slip knit decrease and after the steek as a knit 2 tog decrease, just as you have done with the arm opening steeks. Decrease on every row 22 times, then on every second row until you have the desired amount of stitches left for the shoulders. I left 16 stitches for the shoulder. Continue knitting without decreases. When the arm opening has reached the last row number 18 on the colour chart, put the stitches for the neck on a scrap yarn. There should be 103 stitches left on the back piece, put 97 on a scrap yarn, and cast on 11 stitches for the neck steek. Decrease on stitch on both sides of the neck steek in the same way as for the front three times. On row 24 of the colour chart, bind off the steeks except for the border stitches of the steek. You do now have 18 stitches on every shoulder piece, 16 stitches for the shoulder and two border stitches. Knit the right front shoulder to the right back shoulder, using a three-needle-bind off. Do the same with the left shoulder. If you want to reinforce the arm openings with crochet, do it now. Don’t reinforce the V-neck steeks; it will only make them bulky. Since they will be hidden inside the edge, they will felt and won't open. Cut up the front and back steeks for the neck opening.

Necklineright.jpg
Pick up stitches for the edge between the two stitch legs in the border stitch on the right side of the pullover. I used 3 mm circular needle. You will have a decreased stitch, a half background coloured stitch and then will the edge begin. I picked up 53 on the right side of the neck, the central front stitch, 53 stitches on the left side and the 97 stitches from the neck. I knitted ten rows, but I think twelve or even more would be better.

The decreases and increases at the centre front: You have to decrease at the centre front for what will be the front on the edge, and the again increase the same amount of stitches on the back. I made a decrease on the front that I don’t know what it’s named, I have used it for mitten thumbs when I want there to be just one stitch row showing in the top decreases. One stitch before the centre stitch, put the right needle into the centre stitch knitwise, slowly and carefully ease the stitch before the centre stitch away from the left needle, slip the centre stitch away from the left needle, and pick up the stitch before the centre stitch. You will now have the stitch after the centre stitch and the stitch before the centre stitch on the left needle. Knit them together, then slip the centre stitch over the. The result is a decrease behind the centre stitch. If you have decided to knit all in all twelve rows, do this six times on every row for a steep V, three times on every second row for a less steep V. On the backside, simply increase one stitch on both sides of the centre stitch as many times as you decreased on the front.

Shoulder.jpg
When you have knitted all the edge rows, take a 2,5 mm needle, pick up on the wrong side the purl bump, that is the bar of old gold that is left between the stitches on the back side of the first row of the edge. Just pick up them, don’t knit them. Fold the edge in half with the knit side on the outside, keep the needle with the picked up stitches behind, both needles in the left hand. The steek will now be inside the edge. Carefully match the stitch in the edge and the stitch picked up knit them together and bind off at the same time using the three-needle bind off. The inside of the neck line will be very neat and the steek hidden inside the edge.

If I would redo Venezia’s neck I would probably leave 18 or 20 stitches for the shoulders, and knit the edge two or four rows further. It’s not enough to actually redo it, but for you who considers the alterations, think about it.

June 18, 2007

Short report: finished spindle socks

Spindle1.jpg

Project details:
Pattern: Spindle socks by Anna Bell
Yarn: Debbie Bliss Cashmerino Baby 2 balls
Needles: 2,5 mm
Alterations: Knitted from the toe up. Directions can be found here.
More: I’m totally addicted to knit socks from the toe up! All yarn can be used up, and you’re not let with those irritating small balls, too big to throw away and too small to make anything but bear clothes from. And the fit of this heel is perfect for me.

Spindle2.jpg

June 10, 2007

Socks for my tiger

Stadi cup.jpg

Sofia Stadi cup.jpg So it’s this time of the year again. The Stadi Cup, the biggest girl football tournament in Finland is here again. It started on Wednesday, but my daughter played on Thursday, Friday and Saturday, all in all six matches. They came second in their group, and was thus among the ten best teams (out of thirty) in their age group. It was a very good result, considering they had some very new players among them, who haven’t played football for more than a half year.
I got Sofia’s tiger football socks finished during the Stadi Cup. The girls in Sofia’s team (the Mimmitiikerit, translated to girl tigers) found it very funny that Sofia wpild get a pair of tiger football socks, even if I doubt they will ever be worn as football socks. But for the fun of it, that is the way we took the pictures of them.
Tigeraction1.jpg Tigeractin2.jpg
Tigeraction3.jpg
Tigeraction4.jpg

Project details:
Pattern: My own, knitted from the toe up. Directions for the toe and heel can be found here. Ribbing in 5 knit, 1 purl stitch.
Yarn: Opal sock yarn in the tiger colour way, all of 100 grams.
Needles: 2,5 dpns.

Tigernoaction.jpg

At the end of a long day


June 06, 2007

Look, look! The Spring Cardi!

Springcardiside.jpg

I managed to make a sweater for myself a liiittle bit more suitable for the weather right now than what Venezia is (thank you for all the lovely comments on Venezia! I’ll soon put up the alterations I made for the neckline). The spring cardi has made her debut, and is just lovely to wear. I have never used this Debbie Bliss yarn, Cashmerino Baby, before, and I must say it’s fabulous. It’s just perfect for summer evenings when the temperature has gone down, and you need just something small. Okay, I do feel cold easily, and I take on a sweater hours before hubby does, so perhaps the yarn is too warm for some of you. But for me it’s just perfect.

The pattern is by Anna Bell, and is very well written and clear. I followed it with very few alterations. Since I’m not very busty, I knitted 2 more rows between the increases in the body than what the pattern stated. I was a bit afraid it would have looked too boxy on me, and I’m pleased with how the shaping turned out. There is in the end the same number of stitches, but the increases are not as steep as the pattern advises.

The buttons are what I have understood is called Mother of pearl buttons. I tried several different models and colours of buttons, but found these to make the cardigan most elegant. Click here for a close up of the buttons!

Springcardifront.jpg

Project details:
Pattern: Pippa by Anna Bell
Yarn: Debbie Bliss Cashmerino Baby, 10 balls in colour 503.
Needles: 3, 25 mm Addi crcular needles.
Gauge: 28 stitches and 36 rows to 10 x 10 cm.

And for those of you interested in this cardigan, Lotta at Knitter Nutter has started one in the same colour. Check out her blog for pictures of her progress!

June 02, 2007

First WIP update of the summer

First thanks to everybody for all the supportive Venezia comments! I loved reading them, and I found several interesting new blogs from following the commenters’ links.

I have been starting a couple of small projects since finishing Venezia and the spring cardi (I have buttons now; modelled pictures will be up soon). This post will be a short overview of what is on the needles now.

Firstspindle.jpg

First up are the socks that figured in the seven facts meme. The model is Spindle socks, and the pattern is a freebie by Anna Bell. They are knitted with Debbie Bliss Cashmerino Baby, and the sharp eyed can see that the colour is the same as in the spring cardi. I thought it was a suspicious small amount of yarn stated for the cardi in pattern, and ordered two balls extra, thinking that I’ll make the socks if there is anything left. The amount of yarn, 10 balls for my size, was enough, and the two extra balls went into these socks. They are knitted on 2,5 mm needles. Anna’s pattern is knitted just the regular way, but since I wanted to use all the yarn for the socks, I decided to knit them from the toe up, using this pattern by Brooke Chenoweth Creel for the toes and the heels. The magic loop cast on for the toe she is using is made up by Judie Becker. It’s well known that I’m no fan of short row heels, and this pattern combines the toe-up style with a traditional heel. Perfect! I love this pattern. First sock close to bind off.

Pinvindelar.jpg

The second project is my penguin manufacturing. There is a cute pattern in Knitty, and I had some Novita Seitsemän veljestä yarn in black, almost a ball of Regia Silk in white and two different yellows in Jamieson’s Spindrift. Regia Silk doubled and the yellows doubled equalled almost the Novita yarn. There will be two penguins with different colours on the beaks and feet.

Tiger1.jpg

The third project is also a pair of socks. My youngest daughter is playing football in a team called Mimmitiikerit (a Mimmi is in Finnish a small girl, and also the name of Minnie Mouse, girlfriend of the mouse called Mickey, tiikeri is tiger). I have a 100 gram ball of Opal sock yarn in the colour way Tiger. What you see here is the beginning of a tiger coloured football sock. They are knitted from the toe up according to the same pattern as the Spindle socks, and the ribbing is the traditional football sock ribbing, 5 knit 1 purl stitch. I’m using 2,5 mm dpns, and I’m afraid the leg part will still take forever.

LuddeVenezia.jpg

Welcome to my blog! My name is Maud, and I spend my free hours grooming Afghan hounds, knitting, cooking, and growing bonsai trees. I am since the summer of 2012 reporting from Stockholm Sweden, entries before that are from Esbo, Finland.

My knitting projects in Ravelry


How To

Galleries

Finished in 2012

Finished in 2010

Finished in 2008

Finished in 2007

Finished in 2006


Search


All content copyright 2006-2007 by Maud. All rights reserved. What is copyright?

Powered by
Movable Type 3.2